VLC media player is a versatile media player, available for Windows, Mac, Linux, plus other clones etc., it gives you powerful options of media controls and display, and all for free. You basically set up a channel that anyone on your network who knows the right address can tune in to at any time. You can allow anyone on the network to see the broadcast advertised in their VLC Playlists. Follow the simple steps below to stream audio and video to multiple computers in your network using the multicast.
First, you need to download VLC.
Install it on each computer that you want to be able to watch the streams.
Run VLC on the main computer. This is going to be the “master”, which will be broadcasting to all the others. The “master” won’t show video locally. You’ll have to open a new VLC and connect like others if you want to watch on the main computer.
Click File, then Wizard (ctrl+W in XP). This opens the streaming/transcoding wizard. Make sure Stream to Network is selected and click Next.
For the Input screen, you have two choices. If the file/disc is already in the playlist, then go with Existing Playlist Item and select the appropriate item from the list you want to play. Conversely, you can Select a Stream to choose from a browse box which files/disc to play. After getting the playlist set up, click Next.
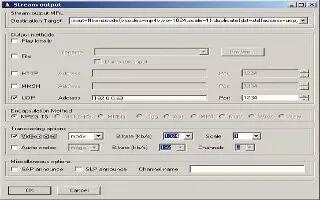
On the Streaming screen, select RTP Multicast. Below that, fill in the special Multicast address you will be broadcasting to. Click Next.
Click Next again for the Encapsulation Format.
For Additional Streaming Options, enter one for Time-to-Live unless you have multiple routers on your network, which is pretty rare for home networks. You could put 2 or 3 just to be safe, if you suspect that there is more than one.
Under Time-to-Live is SAP announce. Check the box and enter a name or phrase that will identify the stream for people in their playlists, like Elm Street Theater, or Casablanca… whatever.
Now click Finish to begin the streaming of the files.
Open another VLC instance (on another computer or the same computer) and open the Playlist (ctrl+P in XP). Click Manage, Services Discovery, and then SAP announcements. An item should appear in your playlist called, strangely enough, Session announcements. The default time for announcements is 5 minutes. After that time you should see the name or phrase for your stream under the Announcements item. Double click on the name and it should start playing.
If you don’t want to wait for the SAP, go to File, Open Network Stream. Choose UDP/RTP Multicast and enter the multicast address that the video is being broadcast to/on. Leave the port numbers alone and click Ok to begin the video playing on the remote VLC. Do this for each computer who wants to watch. Enjoy.
Note
- The multicast address is an IP address that falls within a certain range. Addresses from 224.0.0.0 to 239.255.255.255 are automatically recognized as multicast by your router (if it supports multicast at all). The range 239.0.0.0 through 239.255.255.255 are “administratively scoped, that is, not global addresses, so fine for using on your lan. The address I use is 239.255.100.100. Always works for me:).
- With this set up, you can have an extensive playlist multicasting and continually looping that anyone on your network can join at any time. You could set up a wireless broadcast channel and stream TV (yes, you can stream from a TV tuner card with VLC!), movies, – anything – to as many people as your network can handle. It intelligently ‘casts to only requesting clients, so your computer isn’t getting information after you stop watching, which potentially reduces network load.
- To change the default time for announcements, go to Settings, Preferences, Stream Output, SAP. Make sure “Control SAP Flow” is unchecked and then lower the interval to whatever you need.
- While this will work on 95% of home equipment and networks, this will not work on the internet you probably have at home (using IPv4). Even though home routers have supported this feature for a while, multicast was developed after the current widespread specifications had been standardized. There are, of course, options, but it’s not going to work without using IPv6, the next version of Internet Protocol (which, for some reason, is available and used all over the world, but just isn’t popular yet). If your home router DOESN’T support multicast, you should probably get a new router.
