Your device can synchronize with multiple accounts, including Google, Corporate Exchange, and other email providers. When you synchronize contacts from these accounts with your device, you may have multiple contacts for one person.
Linking, or joining, imported contact records allows you to see all the contacts numbers and addresses together in one contact entry. Linking also helps you keep your contacts updated, because any changes that your contacts make to their information in the respective accounts is automatically updated the next time you synchronize with the account.
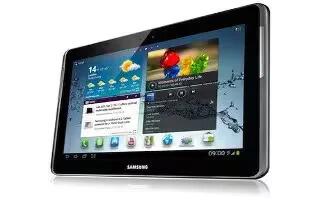
Joining Contacts on Samsung Galaxy Tab 2
- From a Home screen, touch Apps > Contacts
- Touch a contact in the Contacts list to view its information.
- Touch Menu > Join contact.
- Touch the contact you want to Join. The joined contacts information is displayed with the original contacts information.
- Repeat Steps 3 and 4 to join other contacts.
Separating Contacts on Samsung Galaxy Tab 2
- From a Home screen, touch Apps > Contacts.
- Touch a contact in the Contacts list to view its information.
- Touch Menu > Separate contact. A list of Joined contacts displays.
- Touch – > OK to separate a joined contact. The contact is removed from the list.
Sharing Contact Information on Samsung Galaxy Tab 2
You can send a contacts information by way of Bluetooth to other Bluetooth devices or in an Email or Gmail as an attachment.
Note: Not all Bluetooth devices accept contacts and not all devices support transfers of multiple contacts. Check the target devices documentation.
- From a Home screen, touch Apps > Contacts.
- Touch Menu > Share namecard via.
Note: Set up a contact record for yourself to share your information with others.
- At the prompt, choose a sending method. Options are:
- Bluetooth
- ChatON: To send the contact information to your ChatON account.
- Dropbox: To send the contact information to a Dropbox account.
- Gmail
- Wi-Fi Direct: To send Contacts entries directly to an external device through a Wi-Fi connection.
- Follow the prompts to send the contact information.
Importing and Exporting Contacts on Samsung Galaxy Tab 2
To back up and restore your contacts information, you can export your contacts list to a storage device, such as a PC, or import your contacts list (previously exported) from a storage device. Use the USB cable to connect your device to the storage device.
- From a Home screen, touch Apps > Contacts.
- Touch Menu > Import/Export.
- Touch Import from USB storage, Export to USB storage, Import from SD card, Export to SD card, or Send namecard via, then follow the prompts to complete the operation.
Note
This article will work on both Samsung Galaxy Tabs; including Samsung Galaxy Tab 2 7.0 and Samsung Galaxy Tab 2 10.1.
