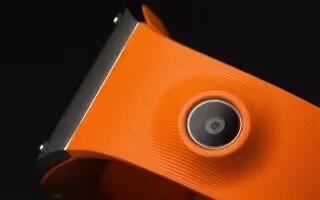
Learn how to use camera on your Samsung Galaxy Gear. This section contains a description of each application that is available on the Galaxy Gear, its function, and how to navigate through that particular application. If the application is already described in another section of this user manual, then a cross reference to that particular section is provided.
Note: Favorite applications found on the Galaxy Gear are managed by the Gear manager application. For more information, refer to My App
Accessing Applications
- Turn on Galaxy Gear and swipe across the screen to view the currently loaded feature applications.
- Swipe across the screens and tap Apps icon.
Archive
- Access notifications from messaging sources such as Messages, Facebook, etc..
Camera
- Use this application to take photos or videos. Use Image viewer to view photos and videos taken with the devices camera.
Note: The camera automatically shuts off when unused. Make sure that the lens is clean. Otherwise, the device may not work properly in some modes that require high resolutions.
Note: If you wish your images and videos to be automatically updated to your connected smartphone, alter the Camera settings > Data Transfer setting to Automatic.
- From the Home Clock screen, scroll to and then tap Apps icon Camera.
or
- From the Home Clock screen, slide the screen down to reveal the camera application screen.Select an on-screen function:
- Camera icon indicates the camera mode is active.
- Camcorder icon indicates the camcorder mode is active.
- Menu icon provides access to the Camera settings menu.
- Swipe left to access the Image viewer where you can view any new photos and videos taken with the devices camera.
Taking Photos
- Verify the camera mode is active.
- Tap the screen to take a photo. The images are also saved in the connected mobile device.
- Swipe left to open the Image viewer and review your images.
Shooting Videos
- Tap Camera icon to change the mode. Verify the camcorder mode is active (indicated by ).
- Tap the screen to begin shooting your video. The videos are also saved in the connected mobile device.
- Swipe left to open the Image viewer and review your images.
Zooming
- Pinch: Pinch the screen using your thumb and forefinger to zoom out when viewing a picture.
- Spread: Spread the screen using your thumb and forefinger to zoom in when viewing a picture.
- Note: Double tap on an image, from within the Image viewer, to zoom in or out.

Camera/Camcorder Settings
To configure settings for Camera:
Verify the camera mode is active (indicated by ). Tap Menu icon to configure settings for the Camera.
- Focus mode: Select a focus mode. Auto focus is camera-controlled.Macro is for very close objects.
- Photo size: Select an available resolution. Using a higher resolution will generate a higher quality image, but will take up more memory.
- Sound & shot: enables 9 seconds of background audio to be recorded along with your image.
- Signature: adds signature logo to your image.
To configure settings for Camcorder:
- Verify the camera mode is active (indicated by ).
- Tap Menu icon to configure settings for the Camcorder.
- Video size: Select an available resolution. Using a higher resolution will generate a higher quality video, but will take up more memory.
