Learn how to organize and print your mail and attachments on your iPad Mini.
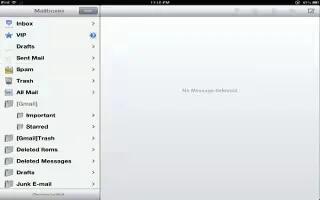
- See messages from VIPs: Go to the mailbox list (tap Mailboxes to get there), then tap VIP.
- Add a person to the VIP list: Tap the persons name or address in a From, To, or CC/Bcc field, then tap Add to VIP.
- Group related messages together: Go to Settings > Mail, Contacts, Calendars, and then turn Organize by Thread on or off.
- Search messages: Open a mailbox then enter text in the Search field. You can search the From, To, or the Subject field in the mailbox thats currently open. For mail accounts that support searching messages on the server, tap All to search From, To, Subject, and the message body.
- Delete a message: If the message is open, Tap delete icon.
- Delete a message without opening it: Swipe over the message title, then tap Delete.
- Delete multiple messages: While viewing the message list, tap Edit.
- Turn off deletion confirmation: Go to Settings > Mail, Contacts, Calendars > Ask Before Deleting.
- Recover a message: Go to the accounts Trash mailbox, open the message, tap recover icon, then move the message to the accounts InBox or other folder.
- Set how long your messages stay in Trash before being permanently deleted: Go to Settings > Mail, Contacts, Calendars > account name > Account > Advanced.
- Turn archiving on or off: Go to Settings > Mail, Contacts, Calendars > account name > Account > Advanced. When you archive a message, it moves to the All Mail mailbox. Not all mail accounts support archiving.
- Move a message to a different mailbox: While viewing the message, tap move icon, then choose a destination.
- Add, rename, or delete a mailbox: In the mailbox list, tap Edit. Some mailboxes cant be changed or deleted.
How to print messages and attachments on iPad Mini
- Print a message: Tap right curved arrow share icon, then tap Print.
- Print an inline image: Touch and hold the image, then tap Save Image. Go to Photos and print the image from your Camera Roll album.
- Print an attachment: Tap the attachment to open it in Quick Look, tap right curved arrow share icon, and tap Print.
For more information, see How to Print with AirPrint.
Note: This article will work on all iPads using iOS 6; including iPad Mini, iPad 2, The New iPad (iPad 3), iPad 4 (iPad with Retina display).
