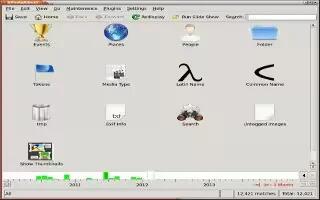
Annotating your images in KPhotoAlbum is, basically, tagging them. Before you do much of anything with your images, like make slideshows or share them, you want to know what is in them. Towards that, one of the first things that you want to do with KPhotoAlbum is annotate them. Follow the simple steps below.
Start up the software. It is a Linux product.
When starting it up for the first time, you need to set up a location for it to look for the images. KPhotoAlbum will remember it.
Wait for a bit. The program will need to catalog the images before you do anything with them.
Click on the Show Thumbnails icon. If you can’t see it, your screen isn’t large enough. Enlarge it or scroll down.
Set the label. This one is probably best saved for doing individual or groups of photos. Like if some of the images are all about caving, label those images as such.
If you aren’t sure of the contents of an image, double click on the image to get a closer look at it.
Note
Be prepared. Since you probably haven’t been doing this before, it will take some time, and probably more than one session, to do this.
