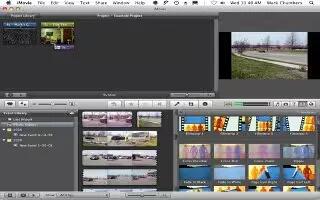
iMovie is a video editing software developed by Apple. It has been included as a part of the iLife suite on all Mac computers and also available for the use on latest generation of Apples handheld devices iPods, iPhones, iPads. It provides the simple interface through which the user can add video clips to the project, separate them with specified points, add transition between clips to create a seamless film, and it is simple to add transitions in iMovie, follow the simple steps below
Open the iMovie application. Do this by either clicking on its icon in the dock, or by navigating to its icon in the “Applications” folder in Finder
Open your iMovie project. From the “File” menu in iMovie, choose “Open” to open your existing project. If you need to create a new project, click “New.”
- If you are creating a new project, you will need to import a video clip into your iMovie project. Do this by clicking and dragging any video file into the iMovie window.
- To move the imported video clip to the timeline for editing, simply drag it from the workspace in the right panel down to the timeline at the bottom of the window.
Split the video clip at the desired point. Transitions can only be added in between 2 clips, so you will need to begin by splitting the clip into 2 smaller clips. To do this, play your movie, and stop the playback at the exact moment you want to split the clip. You can also move the playhead (the vertical line on top of the timeline) by clicking and dragging it. Right-click or control-click on the timeline, and then select “Split clip at playhead.” This will split the clip.
Open the Transition window. Position the playhead between the 2 clips, and then click the button reading “Trans” in the right panel. This will open a window allowing you to select a transition.
Select the type of transition you want. In the window that appears, you will see a list of transitions that are available. Click on any of the names to see a preview in the small window above the list. You can click the button that reads “Preview” to watch the transitions again.
Adjust the speed of the transition. In the Transition window, you will see a slider marked “Speed.” Adjust the slider bar to select your transition speed – how quickly the effect will occur. Durations between a tenth of a second and 4 seconds are available.
Insert the transition into the timeline. When you have chosen a transition and a speed, click and drag the small blue icon to the left of the transition’s name into the timeline.
Allow the transition to render. Once inserted into the timelines, you will see a small red bar slowly move to the right underneath the transition. This represents the time it takes to render the new piece of video generated by the transition.
Preview the video clip. To ensure that the transition looks how you want it to, move the playhead back to the beginning of the first clip and play the movie. You can adjust the transition’s speed again through the Transition window if desired.
Note
You can delete a transition by clicking on it in the timeline and pressing the “Delete” key.
