

Windows 7 will use desktop virtualization so you can run Windows-XP-compatible applications. The only problem people have is with the few applications that refuse to run on it. Designed for Windows XP and 2000, the software may not run on Windows 7. Now we got Windows 7 virtual PC allows you to run Windows XP as well as other operating systems. You don’t need to even own Windows XP separately.
Windows XP Mode is best suited for older business and productivity applications such as accounting, inventory and similar applications. Windows XP Mode is not aimed at consumers because many consumer applications require extensive use of hardware interfaces such as 3-D graphics, audio, and TV tuners that do not work well under virtualization today.
Features
- You can install programs on just like you would on a dedicated PC running XP. All the XP applications should run here without any problems.
- Users can access USB devices attached to the host directly from virtual Windows XP. These devices include printers and scanners, flash memory/sticks and external hard disks, digital cameras, and more.
- Publish and launch applications installed on virtual Windows XP directly from the Windows 7 desktop, as if they were installed on the Windows 7 host itself.
- Cut and paste between your Windows 7 host and any virtual machine.
- Print directly to your attached printer from your seamless application or virtual machine.
Virtual PC
The Component can be downloaded from http://www.microsoft.com/windows/virtual-pc/
Click on “Get Windows XP Mode and Microsoft Windows Virtual PC now” link.
Choose your Windows 7 version and Language.
Download the setup files from the links and install them (First run the Virtual PC setup and then Windows XP mode)
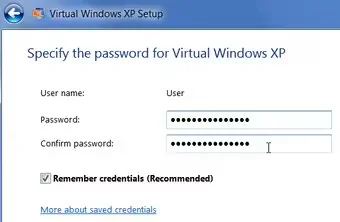
It will ask for Username and password for the first time.
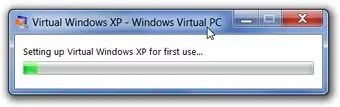
Once installed, click on the Start menu button and browse to All Programs -> Windows Virtual PC. Click on Windows XP Mode and continue. Choose whether to use Network Security features or not. Once that’s done, the virtual PC setup will begin. It will take a maximum of 10 minutes. After that, the Virtual machine is ready for use.
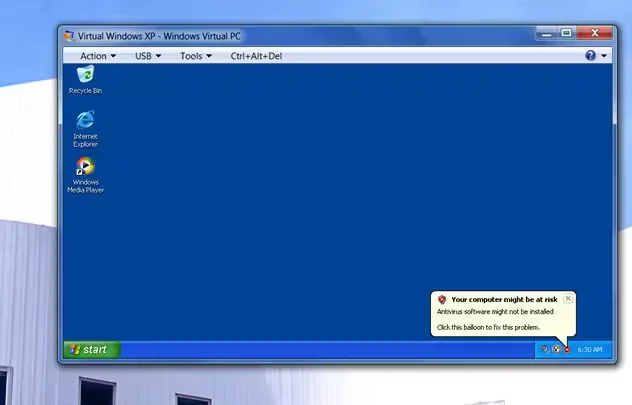
It competes with a notification to install antivirus software – since XP Mode is nothing more than Windows XP in a virtual machine, you should take the advice and install your favorite antivirus application, especially if you’ll be downloading files in the VM.
You can access local physical drives, but they are actually network drives in this case.
Flash drives and DVD drives can also be accessed without any problems.
You can use disc image in the form of ISO and IMG files to install applications and software from.
You can create additional virtual drives as well by clicking on Tools → Settings. Browse down to the Hard disk 2 and 3 options
At this point, you will need to install your applications in Windows XP, and make sure to choose “All Users” anytime you are asked whom to install the software for the integration features won’t work with software that installs just for your user account. If you can’t install for everybody, you can simply choose “Open All Users” on the start menu, and copy a shortcut to the application into the start menu’s programs folder.
Virtual Machine On Host
Applications installed on the virtual machine can also be run by the host OS. For example, if you installed Microsoft Office on an XP virtual machine, you can also find the shortcut for it in the Windows Virtual PC menu.
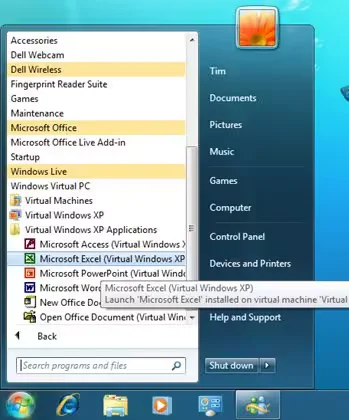
The application runs in virtual machine but without the virtual PC interface around the windows. This way, you can have all the programs setup in XP mode but access them without manually starting up the virtual machine every single time.
Running Another OS
The Windows 7 Virtual PC feature will also allow you to run other operating systems on it, similar to what Virtualbox or VMWare do. To create other virtual machines, go to the same Windows Virtual PC menu in the Start menu, and click on the Virtual Machines. This window shows you the list of all the already configured virtual machines. Click on Create a Virtual Machine on the menu top.
In that window, enter a name for the virtual machine and then the location for VM data to be stored. Click Next, enter the amount of memory you like to dedicate to Virtual machine, minimum is 512 MB. Then create the drive for the Virtual machine. You can create a new disk on your physical drive, or you can use the existing one too. Then the newly created virtual machine should show up in the window. Double-click on it to start the virtual machine. It should run in a window.