Windows 7 – Hide unused libraries in Windows Explorer

The libraries functions in Windows 7 help in structuring data. But a lot of users still prefer the conventional folder structure.
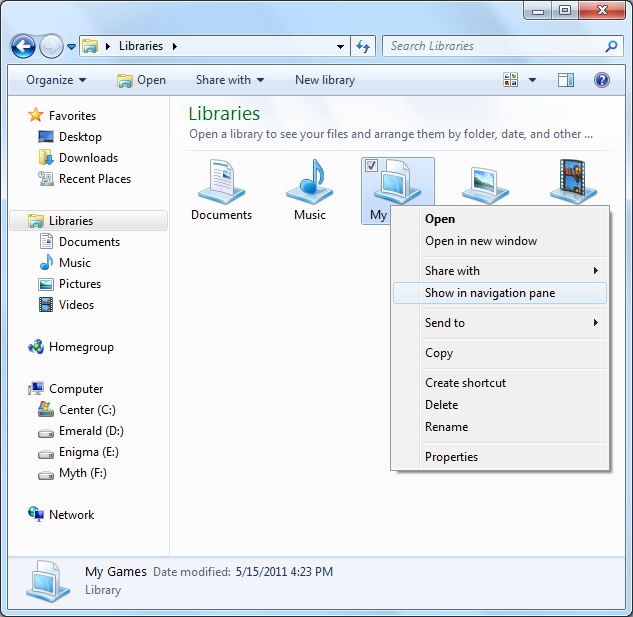
In such case, you can hide the libraries and thus make space for displaying more folders. For this, right click the first library ‘Pictures‘ and select the context command ‘Don’t show in navigation pane‘. Repeat this step for all unused libraries. Alternatively, you can click the ‘Libraries‘ in explorer and right click the libraries and select ‘Don’t show in navigation pane‘. In order to display individual entries again, click ‘Libraries‘ in Explorer. Then right click the desired element and select the context command ‘Show in navigation pane‘.


The main entry ‘Libraries‘ cannot be deleted so easily. To do this, a detour via the registry is necessary. Type ‘regedit‘ in the search field of the Start menu, press Enter and confirm the user account control prompt by clicking ‘Yes‘. Now navigate the key ‘HKEY_LOCAL_MACHINESOFTWAREMicrosoftWindowsCurrentVersionExplorerDesktopNameSpace‘. The select the sub-key ‘{O31E48257B94-4dc3-B131-E946B44C8DD5}‘ and open ‘File | Export‘. Then select a safe storage location, enter a file name such as ‘Explorerlibraries‘ and click ‘Save‘. This is to backup the entry. Then simply delete the subkey in the Registry Editor and confirm with ‘Yes‘. Now close the registry and restart Windows Explorer. A system restart is not required.


In order to display the libraries again, double click the exported REG file and confirm the requests for user account control and adding values into the registry with ‘Yes‘. The libraries will be visible once again the next time you start Explorer.
I hope this article is useful to you. Please leave your comments below.