How To Use Maps – iPad Air
Learn how to use maps on your iPad Air. For important information about navigating safely and avoiding distraction while driving.
Find places

Note: For important information about navigating safely and avoiding distraction while driving.
Note : Maps, directions, Flyover, and location-based apps depend on data services. These data services are subject to change and may not be available in all areas, resulting in maps, directions, Flyover, or location-based information that may be unavailable, inaccurate, or incomplete. Some Maps features require Location Services. See “Privacy.”
Move around Maps by dragging the screen
-
To face a different direction, rotate with two fingers.
-
To return to north, tap the compass icon in the upper right.
Zoom in or out
-
Double-tap with one finger to zoom in and tap with two fingers to zoom out or just pinch and stretch. The scale appears in the upper-left while zooming. To change how distance is shown (miles or kilometers), go to Settings > Maps. You can search for a location in different ways.
-
Intersection (8th and market)
-
Area (greenwich village)
-
Landmark (guggenheim)
-
Zip code
-
Business (movies, restaurants san francisco ca, apple inc new york) If Maps guesses where youre headed while youre entering a search, tap that location in the list below the search field.
- Find the location of a contact, or of a bookmarked or recent search. Tap Bookmarks.
- Choose your view.
- Tap i, then choose Standard, Hybrid, or Satellite.
- Manually mark a location.
- Touch and hold the map until the dropped pin appears.
Get more info
Get in fo about a location.
-
Tap a pin to display its banner, then tap i. Info might include Yelp reviews and photos, a web page link, directions, and more.
-
Tap Share to share the location
Get directions
Note: To get directions, iPad must be connected to the Internet. To get directions involving your current location, Location Services must also be on.
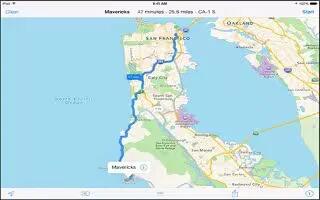
Get driving directions
Tap Directions, enter the starting and ending locations, then tap Route. Or, choose a location or a route from the list, if available. If multiple routes appear, tap the one you want to take.
-
Hear turn-by-turn directions (iPad Wi-Fi + Cellular): Tap Start.
-
Maps follows your progress and speaks turn-by-turn directions to your destination. To show or hide the controls, tap the screen.
-
If iPad auto-locks, Maps stays onscreen and continues to announce instructions. You can also open another app and continue to get turn-by-turn directions. To return to Maps, tap the banner across the top of the screen.
-
With turn-by-turn directions, night mode automatically adjusts the screen image for easier viewing at night.
-
View turn-by-turn directions (iPad Wi-Fi only): Tap Start, then swipe left to see the next instruction.
-
Return to the route overview: Tap Overview.
-
View the directions as a list: Tap List icon.
-
Stop turn-by-turn directions: Tap End.
-
Get driving directions from your current location.
-
Tap on the banner of your destination. If youre a walker, set your directions preference to Walking in Settings > Maps.
Get walking directions
-
Tap Directions, then tap Car icon. Enter the starting and ending locations, then tap Route. Or choose a location or a route from the list, if available. Tap Start, then swipe left to see the next instruction.
Get public transit directions
-
Tap Directions, then tap Bus icon. Enter the starting and ending locations, then tap Route. Or choose a location or a route from the list, if available. Download and open the routing apps for the transit services you want to use.
Find out about traffic conditions
-
Tap i, then tap Show Traffic. Orange dots show slowdowns, and red dots show stop-and-go traffic. To see an incident report, tap a marker.
Report a problem
-
Tap i, then tap Report a Problem.
3D and Flyover
-
On iPad 3rd generation or later, you can see three-dimensional views and even fly over many of the worlds major cities.

Use 3D or Flyover
-
Zoom in until 3D or Flyover icon becomes active, then tap the button. Or, drag two fingers up. To switch between 3D and Flyover, tap the lower-right corner and change views.
Adjust the camera angle
-
Drag two fingers up or down.
Maps settings
Go to Settings > Map. Settings include:
-
Navigation voice volume (iPad Wi-Fi + Cellular)
-
Distances in mile or kilometers
-
Map labels always appear in the language specified in Settings > General > International > Language
-
Preferred directions by driving or walking