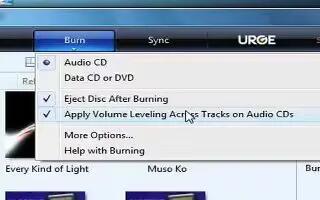
You can copy or burn a CD using Windows Media Player, follow the simple steps below
If you don’t have your favorite songs on Windows Media Player, simply download some, or import some from one of your favorite CDs. Just insert your CD into the CD Drive, or CD-RW drive, go to Windows Media Player, and copy the desired tracks by clicking on the checkboxes, going to Copy from CD, or Rip, and press “Copy,” or “Rip Music.”
When the tracks are copied to the Media Library, go to “Copy to CD or Device,” or “Burn,” insert a blank CD, and press “Copy,” or “Burn CD.”
When the burning or copying process is complete, the disc should most of the time eject automatically. If it doesn’t, you can easily eject it yourself. It should play on a CD Player.
Note
- Label the CDs with a black felt-tip marker, like a Sharpie, for instance, after you burned them on your computer.
- For a professional look, get CD/DVD Labels and use the template to create your own CD/DVD labels, so you don’t have to go with the boring black marker look. These are available at home office stores.
- Before you label your CDs, it’s a good idea to test them first to make sure they work.
- Do not give track protected CDs to people.
- Sometimes, not all desired tracks can be burned onto your CD, so do not add too much.
