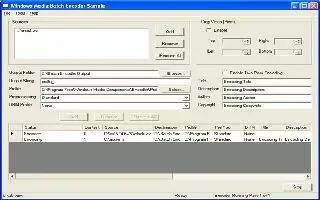
You can convert the rmvb, ram, rm file formats to wmv using the Windows Media Encoder, and it is free. Follow the simple steps below
You need to download Windows Media Encoder to your computer (WMEncoder.exe), and then complete the installation by double-clicking on “WMEncoder”
You also need to download a Codec Pack which supports Windows Media Encoder decoding rmvb/ram/rm files. Codecs are needed for encoding and decoding (playing) audio and video. This time we need special codecs to support RealMedia files format, since the original Windows Media Encoder wont support this format. A free codec package K-Lite Mega Codec Pack is used here.
- Download this package to your computer(klmcodec416.exe).
- Complete the installation by double-clicking on “klmcodec416”.
While installing K-Lite Mega Codes Pack, you just follow the step by step instructions. However, you need to make sure that the RealMedia Components in Select Components is checked, otherwise, the Windows Media Encoder wont be able to decode the RealMedia files properly.
After all the software you need has been installed successfully, it is recommended that you Restart your Windows/Vista to make sure that all the software is configured properly. Now, you can go to the next step and begin to convert RealMedia files to wmv format by using Windows Media Encoder.
Run the Windows Media Encoder 9 software. When the program window appears, you can see the New Session window dialog, select Customer Session and click yes. This is your starting point to configure Window Media Encoder 9 for converting RealMedia files.
- You have to change the following settings in the Session Properties:
- Under Source Tab, select File option under Source From.
- Click Browse to select the RealMedia files from your computer. When the Browse for Source File window appears, select All files (*.*) under the file type, otherwise you wont be able to see your RealMedia media files anywhere on the screen.
- Choose “At End” and make sure that “Stop” is selected in the “At End” box.
If you want to convert more than one RealMedia media files into one wmv file, here is what you need to do (otherwise, skip this step):
- Click Source1. In the Session Properties dialogue box, select Roll Over to Next Source in the “At End” box.
- Click Add button at left-bottom corner to add another source named source2 under source list.
- Add another file under list source2 following instructions in step 6. If this is the last input file, select Stop in the “At end” box. Otherwise select Roll Over To Next Source again and add source3 and so on, until last input file is added and Stop is selected for the last source.
Under Output Tab in Session Properties window:
- Deselect Pull from encoder [the connection is initiated by the server or players].
- Select Encode to file and enter the output file name and its path where the file should be stored. Leave the other selection option as default.
Under Compression Tab in Session Properties window:
- Under Destination, select File archive.
- Click Apply on the bottom of Session Properties window. Now all configurations for Window Media Encoder are done.
After you close the session properties window, you will see the entire Video window. There are two items with options. One is Display option: input, output, both, next, split. Under Zoom option you can select 300%, 200%, 100%, 50%, 20%. These parameters just being used for what you will see on the screen during files processing.
Click the Start Encoding green play button on the upper bar, the real converting work begins. You can watch the video without sound while the file is undergoing conversion. The processing time depends on how fast your computer CPU is and how big the RealMedia files is.
Note
- Never try to install K-Lite Codec Pacd 4.7.0. It wont work for Windows Media Encoder 9.
- If you want to convert your RealMedia files into a High Definition Quality Video, go to Properties, choose Compression tab and select Web server [progressive download] under Destination.
- You can also set up output video format as NTSC or PAL by selecting Tools menu, choosing options, and checking NTSC or PAL under Set Video format.
- By using this method, you should be aware the copyright of all files you are going to us
