How To Use Assistive Touch – iPad Mini 2

Learn how to use assistive touch on you iPad Air. AssistiveTouch helps you use iPad if you have difficulty touching the screen or pressing the buttons. You can use a compatible adaptive accessory (such as a joystick) together with AssistiveTouch to control iPad. You can also use AssistiveTouch without an accessory to perform gestures that are difficult for you.
Turn on AssistiveTouch
-
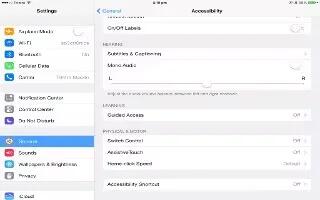
Go to Settings > General > Accessibility > AssistiveTouch, or use the Accessibility Shortcut. See Accessibility Shortcut
Adjust the tracking speed (with accessory attached)
-
Go to Settings > General > Accessibility > AssistiveTouch > Touch speed.
Show or hide the Assistive
- Touch menu.
-
Click the secondary button on your accessory.
Hide the menu button (with accessory attached)
-
Go to Settings > General > Accessibility > AssistiveTouch > Always Show Menu.
Perform a multi-finger swipe or drag
-
Tap the menu button, then tap Device, More, then Gestures. Tap the number of digits needed for the gesture. When the corresponding circles appear on the screen, swipe or drag in the direction required by the gesture. When you finish, tap the menu button.
Perform a pinch gesture
-
Tap the menu button, tap Favorites, and then tap Pinch. When the pinch circles appear, touch anywhere on the screen to move the pinch circles, then drag the pinch circles in or out to perform a pinch gesture. When you finish, tap the menu button.
Create your own gesture
-
You can add your own favorite gestures to the control menu (for example, tap and hold or two-finger rotation). Tap the menu button, tap Favorites, then tap an empty gesture placeholder. Or go to Settings > General > Accessibility > AssistiveTouch > Create New Gesture.
Example 1: To create the rotation gesture, go to Settings > Accessibility > AssistiveTouch > Create New Gesture.
-
On the gesture recording screen that prompts you to touch to create a gesture, rotate two fingers on the iPad screen around a point between them. If it doesnt turn out quite right, tap Cancel and try again. When it looks right, tap Save and give the gesture a namemaybe Rotate 90. Then, to rotate the view in Maps, for example, open Maps, tap the AssistiveTouch menu button, and choose Rotate 90 from Favorites. When the blue circles representing the starting finger positions appear, drag them to point around which you want to rotate the map, then release. You might want to create several gestures with different degrees of rotation.
Example 2: Lets create the touch and hold gesture that you use to start rearranging icons on your Home screen. This time, on the gesture recording screen, hold down your finger in one spot until the recording progress bar reaches halfway, then lift your finger. Be careful not to move your finger during recording, or the gesture will be recorded as a drag. Tap Save and name the gesture. To use the gesture, tap the AssistiveTouch menu botton and choose your gesture from Favorites. When the blue circle representing your touch appears, drag it over a Home screen icon and release.
Lock or rotate the screen, adjust iPad volume, or simulate shaking iPad
-
Tap the menu button, then tap Device.
Simulate pressing the Home button.
-
Tap the menu button, then tap Home.
Move the menu button
-
Drag it anywhere along the edge of the screen.
Exit a menu without performing a gesture
-
Tap anywhere outside the menu. To return to the previous menu, tap the arrow in the middle of the menu.