How To Use Contacts – Android Lollipop
You can use the contacts app; and you can add, view, delete, import contacts on your devices running Android Lollipop. The Contacts app gives you quick access to everyone you want to reach. To open it, touch the Contacts icon on a Home or All Apps screen.
When you first turn on your device and sign into a Google Account, existing contacts from that account are synced with your Contacts app. After that, your contacts stay in sync automatically on your different devices or a Web browser.
If you use Exchange, you can also sync that contact information with Contacts.
All your Contacts information is available from Gmail, Google Talk, and other apps. As you add contacts from different sources, theyre synced automatically across all the places you need them.
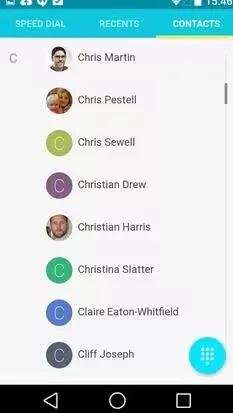
When you open the Contacts app, you can:
- View all contacts or favorites. Choose from the top of the screen.
- Add a contact. Touch Add Contact icon.
- Read details. Touch a name to see details for a contact or group.
- Share the contact or place a frequently used contact on the Home screen. Touch Menu icon.
- Edit details. While viewing a contact, touch Edit at the top of the screen to edit the contact’s information.
- Change your settings. While viewing the main list screen, touch Menu to import or export contacts, choose display options and add or edit accounts.
Add Contacts
To add a contact manually, follow these steps:
- Open the Contacts app contacts on your device.
- Touch the add contact icon .
- If you have more than one Google Account synced with Contacts, touch the account you’d like to use.
- Touch a field to start typing in the contact’s information. Make sure to swipe down to view all categories.
- To add more than one entry for a category – for example, to add a work address after typing a personal address – touch Add new icon.
- To open a menu with preset labels, such as Home or Work for an email address, touch the label to the right of the item.
- To create your own label, touch Custom in the menu.
- To add a person to a contact group, touch the Groups field. Or touch Create new group in the menu to add the contact to a new group.
- To open a menu with a variety of other kinds of contact information you can add, touch Add another field.
- When you’re finished, touch Add new contact icon.
Edit contact details
After you’ve added a contact, you can change the information entered whenever you need to by following these steps:
- Open the Contacts app contacts on your device.
- Touch the contact you want to edit.
- Touch the Edit icon .
- Edit the contact information.
- Touch Edit contact icon.
Delete a contact
- Open the Contacts app contacts on your device.
- Touch the contact you want to delete.
- Touch the Edit icon.
- Touch the Menu icon.
- Touch Delete.
- Touch OK to confirm that you want to delete the contact.
If you delete a contact from a Google Account, the contact will also be deleted from Contacts on the web the next time you sync your device.
Import Contacts From SIM Card
To import contacts from a SIM card, follow these steps:
- Install the SIM card with your contacts on it in the device.
- Open the Contacts app contacts on your device. If you’re running Android 4.4 or lower, you may need to open the People app instead.
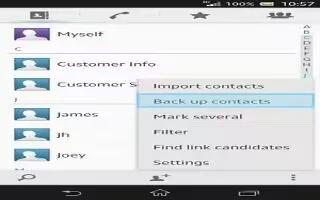
- Touch the Menu icon.
- Touch Import/Export.
- Touch Import from SIM card. Your screen will say “Reading from SIM card“
- Select the contacts you want to import. To import all at once, touch the Menu icon, then Import All.


 RSS - All Posts